Sunday, October 31, 2010

Onesies, Onesies, Onesies

I'm cranking these out right now...


If you are in need of a cute baby gift with that handmade touch, these are a great way to go.  Embellishing onesies doesn't take a lot of time or skill but the end result is soooo cute!


I'm working on some holiday versions as well and plan to post a tutorial next week.  I know - this is so easy - you can probably figure out how to make them yourself.  But I'll go ahead and share my technique just in case.


This last one is just a tiny nine-patch.  I used nine different 1 1/2 inch squares and a 1/4 inch seam. 

More to come next week.  

Happy Halloween, by the way!  We're getting ready to put the kids in their costumes and hit the streets.  I'll share some photos of the little ones dressed up next week too.

Enjoy!

Friday, October 29, 2010

In High Gear

Kids cooperated with naps today, so I was able to get a little Smallest Sparrow sewing done.  One order done, five more to go!


Wish me luck as I try to crank them out this weekend.

I'm also working on a new tutorial and hope to post it sometime next week.  Stay tuned.

Have a good one!

Thursday, October 28, 2010

I Love Autumn

Again - no real sewing to show you.  I feel like I've been so busy with basic life stuff.  I miss hearing the hum of my machine but I've decided that sometimes sleep is more important than productivity.  :-)  I'm hoping to get a little stitchin' in this weekend.

In the meantime, I'm enjoying the beautiful fall colors with my kids. Daniel and I went out and collected branches and gorgeous red maple leaves yesterday.  It's so fun to watch him admire nature.  Every rock, stick and leaf is a new treasure for him.


We've had some crazy weather here in Chicago.  High winds actually knocked Daniel off his feet the other day.  A big gust just came along and  sent him to the ground.  I was worried that he'd be scared but he looked up at me and said, "That was fun, Mama.  Can we do it again?" Kids!  They say the cutest things.


Hope you're enjoying this wonderful season too!

Tuesday, October 26, 2010

Almost Halloween

I can't believe Halloween is almost here!  My son is soooo excited and the enthusiasm is building.  He had his first preschool Halloween party today and he had a blast.  Candy corn, rice krispie treats and a fireman costume... what's not to love?

I'm a bit backed up on Smallest Sparrow orders right now, so I've had to take a little break from the personal sewing.  But I did manage to throw together this onesie for my daughter.


Boo!


Be back soon...

Monday, October 25, 2010

Another Scrappy Quilt in Progress

So I'm back from a fun trip away with three of my favorite friends.  A little wine, some good food and great conversation was just what this mama needed.  Thank you Cathy, Monisha and Jaimee!  I had such a fun time and can't wait for next year!

So - I'm back to the sewing table.  And I'm starting another scrappy tumbling blocks quilt... this time for Daniel.  Why wouldn't I start a new project when I have five babies to sew for, need to start sewing Christmas gifts and have about 15 other items on my to-do list.  There's no knowing when this one will be completed but I got the bug and just had to cut some fabric.  You know how that is... sometimes a little time with your rotary cutter can be so therapeutic.


Hope you're all having a great Monday!

Friday, October 22, 2010

Have a Great Weekend!

I'm off to beautiful Galena, IL for an overnight with some girlfriends.  I know - I'm SO LUCKY!  I can't wait.  Looking forward to some much needed rest and relaxation, not to mention girl talk.  Thank you, hubby, for holding down the fort while I'm gone.

I'm sure gonna miss these little guys...


Hope you're up to something fun this weekend as well.  

See you Monday!

Thursday, October 21, 2010

A Few Images From Maddy's Room

Yesterday, I posted some images of items I either made or tweaked in my son's room.  Today - I thought it would be fitting to show you a few of my favorite things from my daughter's room.

Rose Petal Lampshade:
When decorating a room, I'm always on a budget which usually means that I have to make things myself (good thing I love to create!).  I adore the Canadian designer Sarah Richardson and I first saw a rose petal lampshade on her show Room Service.  I know these lamps can cost a pretty penny, so I decided that if I wanted one in my baby girl's room (and oh how I wanted one), I'd have to make it myself.  I bought a basic white lamp base and shade at Target and went to town.


I cut long strips of yellow fabric, folded them in half, hand basted each strip so that I could get a little gathering going, then rolled and glue-gunned.  This process took FOREVER.  I think I worked on this little lamp for three months.  But it was worth it.


I really love the soft illumination this lamp provides.  It's just the right amount of light for those late night wake-ups.


Burp Cloths:
Burp cloths are kind of my specialty.  I've been selling personalized burp cloths for the last few years and they are by far the most popular item that I sell.  They are such a necessity and it's nice to have a few pretty ones in your nursery.


These add a fun splash of color to my daughter's room and are ready to catch whatever comes up.  (Pardon the pun!).

Door or Dresser Pillow:
I made this little cutie with my daughter's first initial.  I've made these for lots of babes (another popular item in my shop) and they look so cute hanging on the nursery door, from a dresser knob or on a hook in the room.


I'll leave you with this image of a little tray I keep on top of Maddy's dresser.


Don't those pacifiers look like candy?  Yum.  Hmmm.... must go raid Halloween candy stash.

What DIY projects have you done for your little ones' rooms?

Wednesday, October 20, 2010

Some Small Projects for Daniel's Room

I've been busy trying to jazz up my little boy's room a bit.

Do you have one of these ugly eyesores in your home?


Well ours is on a prominent wall in our son's room.  I know an electrical box is a pretty important thing to have in a home but why does it have to be so ugly???  Someone should get into the business of creating decorative electrical panels.  We've fancied up pretty much everything else in this world.  Why can't these come in polka dot or plaid and in cute colors to match your decor?  Hmmm.... something to think about.

Anyway - I have been looking for something just the right size to cover this for years.  I've looked for picture frames and corkboards and on and on and on.  Nothing seems to be tall and skinny enough to cover all of this gray.  So - I had the idea to take two cork boards, place them together vertically, attach them with some hardware and cover with fabric.  Yesterday our eyesore became eye candy.


I just staple gunned the fabric to the back of the corkboard and voila!  A place to put Daniel's preschool art projects.

A couple of frames also got the fabric treatment.


And I finally covered this big "D" with fabric.  It was a little tricky and has a few imperfections but I don't think they'll be too noticeable once I get this guy hung on the wall.  The good news is that I managed to stay burn-free as I used the glue gun.


Here's to crossing a few things off the list!

Have a wonderful day.

Monday, October 18, 2010

Happy Anniversary...

to my wonderful hubby.  It's been a glorious seven years!


You are the best!

Friday, October 15, 2010

A Quilt for Baby Brady

This is a quilt that I have been working on for a loooooong time.  It's one that I've been picking up and putting back down for far too long.  I'm embarrassed to admit that this is for a baby who was born in July.  Yes - I'm that far behind on my baby gifts.


I'll take you back through my process.  Baby Brady's mom had commissioned me to make some pillows for his nursery back in the spring.  She sent me extra crib sheets to use as the fabric (the polka dot print.)  I had a few scraps leftover, so I paired them with a few other coordinating fabrics I had on hand to create a very basic patchwork quilt top.  Here is the quilt taped to my floor, pin basted and ready for quilting.


Since I had done such a simple patchwork design, I decided to get creative with my quilting to give this quilt more visual interest.  That's how this little guy earned the name "The Snowball Quilt."


I decided to use three different quilting designs so each square is unique.  This is basically one big nine-patch. Three squares are quilted in a design I'll call "square within a square," three are done with vertical lines and three are done with diagonal lines.  


Shortly after I started this process, I realized just how crazy long it was going to take me.  I liked the way it was looking, but I'll admit that I thought, "what have I gotten myself into???"


But I'll also admit that I'm pretty happy with the end result.  It was actually a lot of fun to shift my focus from more involved piecing to more involved quilting.  And it gave me lots of time to practice my straight-line quilting techniques.

I used my embroidery machine to make a little patch with baby's name on it and sewed that to one of the squares.


I hope Brady and his parents enjoy this little quilt as much as I enjoyed making it.

Thursday, October 14, 2010

Random Thoughts and a Family Portrait Session

Good morning.  I've been up all night working on a quilt for a friend's baby.  I love how quiet it is around our house in the middle of the night.  It's really the only time I can get a solid chunk of time to work on my sewing and quilting.  I find that I just can't make real progress when I only work for an hour here or there.  I'll show you some photos of the quilt tomorrow.  I'm calling it "The Snowball Quilt" and you'll see why.  I started a very time consuming quilting process and once I started, I just couldn't stop.

So - yesterday was a big day for my blog!  Thank you to Ohdeedoh for posting my Fussy Cut Wall Art Tutorial.  What a thrill to see my work on one of my favorite blogs!  If you aren't familiar with Ohdeedoh, go check it out!  You'll love it.

And what a day for our world!  It was also a thrill to see the 33 trapped miners in Chile rescued.  Thank you, God.  Miracles happen!

This past Saturday the lovely and talented Francesca Madden of Francesca Madden Photography did a portrait session for my family. We chose North Avenue Beach in Chicago as our location and the backdrop could not have been more spectacular.  It was a beautiful day here and Francesca captured some wonderful images of my little ones.  I managed to grab this quick shot of Daniel with my own camera.


You can see a sneak peek of our photo session on Francesca's blog here. There's something about seeing these pictures of my kiddos that makes me fall in love with them all over again.  Thank you, Francesca!

Wednesday, October 13, 2010

Great Grandmother Quilts

I thought I'd share photos of a couple of my greatest inspiration quilts.

These gorgeous specimens were pieced by my maternal great-grandmother and hand-quilted by a group of women at her church.  My mom estimates that these quilts were made around 1910.


One features a fan block and one features a dresden plate block.  The blocks were made from tiny scraps of fabric taken from old house dresses.  I don't think my great-grandmother and her family had a lot of money and they were careful to repurpose every little piece of fabric in the house.  When I was growing up, I remember seeing many of the same fabrics from these quilts in potholders and other items around my grandmother's home.

As a child, I admired these quilts and carefully studied each and every fabric.  I was (and still am) in awe of the tremendous color and pattern in these quilts.  This must be where my love of fabric originated.  I am still inspired each time I look at these beauties and am thankful my mom has entrusted them to me.


These quilts are large... probably intended for a full size bed.


Sadly, the bindings are beginning to fray.  I'll have to look into repairing them at some point.


Isn't the handwork on these blocks amazing?  Gorgeous.


I hope my great-grandmother quilts will bring you some inspiration today.

Tuesday, October 12, 2010

It's Coming Along...


Slowly but surely.  I have been quilting this puppy for about a week now. I decided to do lots and lots of straight lines which isn't particularly difficult but it is time consuming.  I always have two or three (or 30!) projects going at once so this one has been moved to the back burner a couple of times but I try to pick it up and sew a few lines here and there.  I'm starting to see some progress and I'm excited!

The straight line quilting was definitely inspired by one of my favorite quilting blogs - Red Pepper Quilts.  Check out all of the gorgeous work over there and get inspired yourself.

Have a great day, everyone.  Be back soon.

Sunday, October 10, 2010

Free Tutorial - Fussy Cut Wall Art

I've been hard at work creating some fun wall art for my kids' rooms and writing up a tutorial so that you can try it yourself!  I hope these instructions make sense.  If you have any problems or questions, please feel free to e-mail me and I'll try to help.  Hope you have fun with this project!


Free Tutorial - Fussy Cut Wall Art
(assumes some sewing knowledge)

Materials:
  • One matted picture frame with an 8" x 10" opening (usually an 11" x 14" frame), glass removed
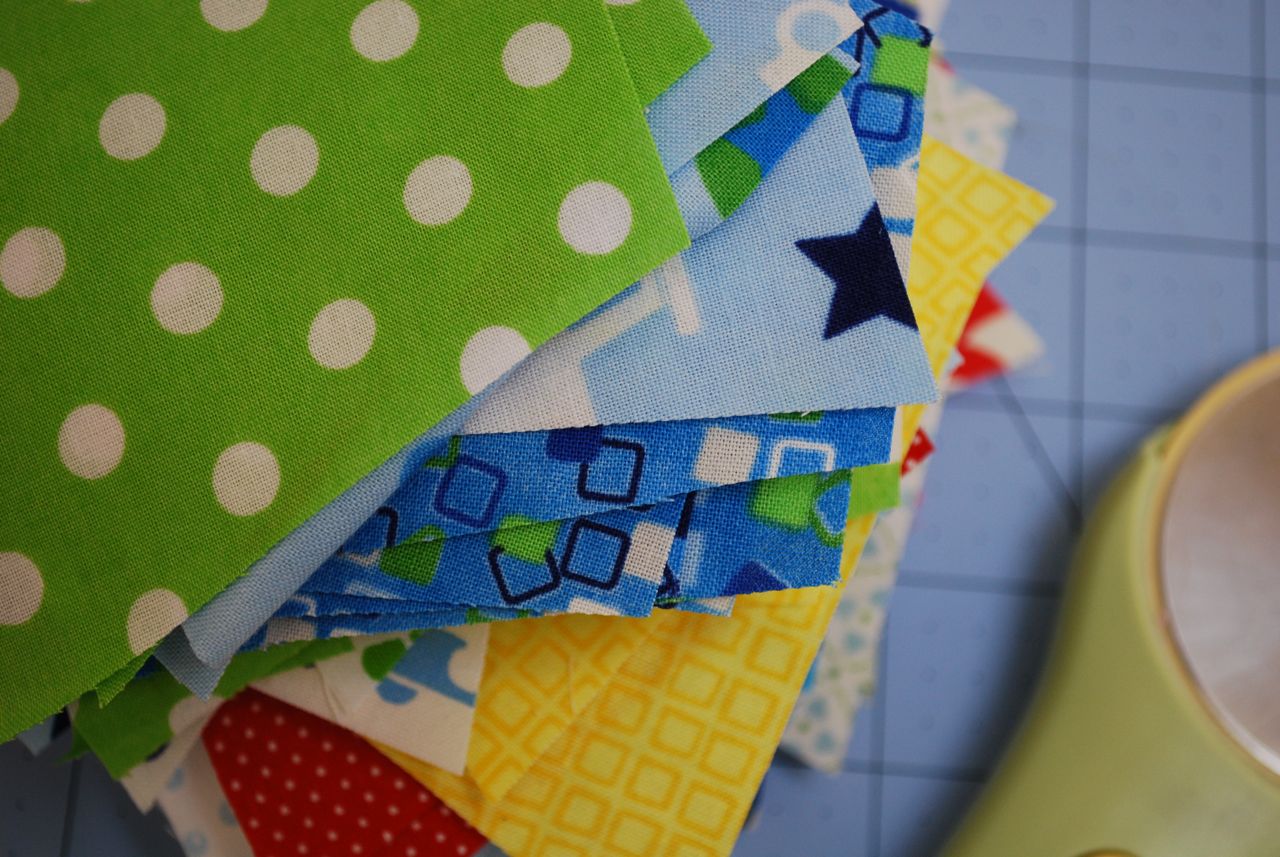
  • One 3" x 3" square of quilting fabric, fussy cut to show off a design or motif (fabric A) 
  • Two pieces of 3" x 2" white cotton quilting fabric
  • Two pieces of 5 3/4" x 2" white cotton quilting fabric
  • Two pieces of 5 3/4" x 4" coordinating / contrasting quilting fabric (fabric B)
  • Two pieces of 12 1/2" x 2 1/2" coordinating / contrasting quilting fabric (fabric B)
  • Two pieces of high loft batting, one cut to approximately 9" x 12" and the other cut to approximately 6" x 9"
  • 8 1" pieces of painter's or other masking tape
This is a very simple project -- one that can be whipped up in less than an hour.  You are simply sewing a basic quilt block, taping that to the back of a mat, adding some batting and hanging.  There are so many fun fabrics on the market that would work beautifully for this project.  I used Jillian Phillips' "To the Rescue" by Hoffman California International Fabrics for my son's room and Sandi Henderson's Ginger Blossom as well as a print from Joann for my daughter's room.


The first step is to cut all of your fabrics.  I like to use a rotary cutter but it's not necessary.  You could just as easily trace your pieces with a fabric pen and ruler and then cut with fabric scissors.

Fussy cut your 3" x 3" square of fabric.  Fussy cutting simply means to center and cut a particular design or motif.  


Next, sew your 3" x 2" white cotton strips to the top and bottom of your fussy cut square using a 1/4" seam allowance.  Press seams open.


Then sew your 5 3/4" x 2" strips to the opposite sides of your fussy cut block, again using a 1/4" seam allowance.  Press seams open.


Now take your two 5 3/4" x 4" pieces of fabric B and sew them to the top and bottom of your quilt block (1/4" seam).  Press seams open.


Then sew the longer 12 1/2" x 2 1/2" strips to the opposite sides of the block (1/4" seam).  Press seams open.

Now remove your mat from your picture frame and place wrong side up on your work surface.  Flip your quilt block and center on the back of your mat.


Take your masking tape and gently tape the block to the mat as shown above.  You'll want to tug ever so slightly as you do this but be careful... too much tugging can warp your seams.  Flip over to see your work and make adjustments as necessary.  


Now flip back over and place into your glass-less picture frame right side down.  Place your larger piece of batting on the quilt block, topped with the smaller piece of batting.


Replace the back of the frame and voila!  Inexpensive, bold and attractive wall art for your child's room, nursery or playroom.


Let me know what you think!

Big thanks to Apartment Therapy's Ohdeedoh for featuring this project here.